ARCHIVED: Use WinSCP to connect to Webserve
This content has been archived, and is no longer maintained by Indiana University. Information here may no longer be accurate, and links may no longer be available or reliable.
Note:
UITS suggests using WinSCP as your Secure File Transfer Protocol (SFTP) client. WinSCP is available for free from IUware.
- To open WinSCP, double-click its icon on your desktop (
 );
alternatively, click , select , then
, and then .
Note:
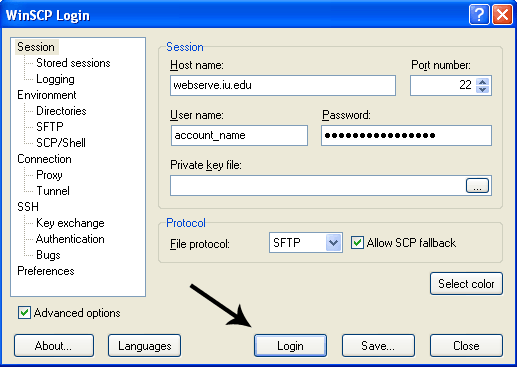
 - Enter the following:
- Host name:
webserve.iu.edu - User name: Name of your web account
- Password: Your Webserve account passphrase
Note:
- Host name:
- Click .
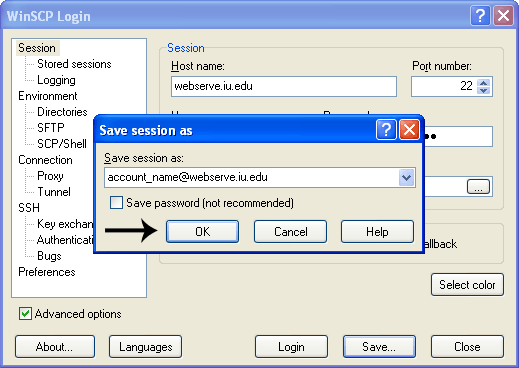
- To retain your connection settings, click . For
security reasons, UITS recommends that you do not
save your passphrase.
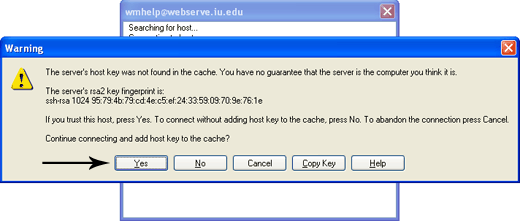
- The first time you connect to your account on Webserve, you may
receive a "Warning" prompt similar to the screenshot below. Click
. The prompt will not appear again.
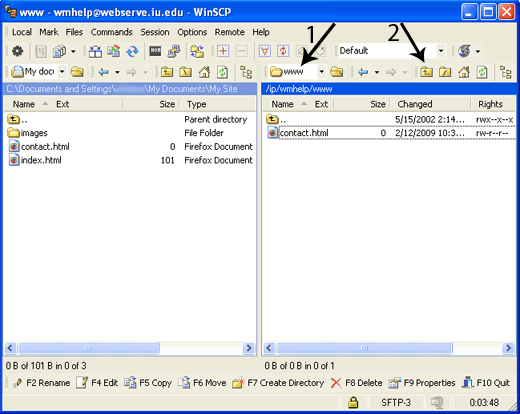
- On the left, you will see the files and directories of your local
computer. On the right, you will see the contents of your account on
Webserve.
To access your account's
wwwdirectory, double-click or its folder icon. The files in thewwwdirectory will appear on the right.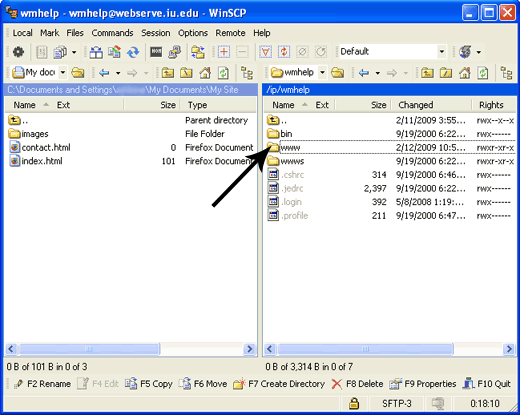
The drop-down menu with the folder icon shows which directory you are working in on your Webserve account (1). To move back to your login directory, click the up arrow folder icon (2).
- To transfer files, drag and drop your files between the two
panes:
- To upload files to your web account, drag files from the left pane (local computer) to the right pane (Webserve account).
- To download files from your web account, drag files from the right pane (Webserve account) to the left pane (local computer).